
Table of contents:
Before I get into the details of how we grew out our first amazing covid garden in 2020, I have to give a shoutout to four people (whom I’ve never met!), who gave me a ton of knowledge to help us along our way. Without these people publishing hundreds of hours of video on youtube, there’s no way our first year garden would have been this successful.
- Luke Marion from MI gardener on youtube. Author of The Autopilot Garden.
- Melissa Norris. Author of The Family Garden Plan.
- Kevin Espiritu from Epic Gardening on youtube. Author of Urban Gardening.
- Mark Valencia from Self Sufficient Me on youtube.

I’m not being paid to say this, but these three folks have provided such a wealth of knowledge for free on youtube and through their writings. Thanks to them, we were able to construct a healthy first year garden that provided us with loads of food throughout the summer. Please go check out their youtube channels or buy their books if you’re thinking of building a garden.

tl;dr — What we learned our first year growing
Here are some important things we learned about our personal garden here in New England (USDA Zone 6).
- Don’t rush to plant outside. Weather is crazy and unpredictable (depending on you region). We had ice on May 1, which I’ve never seen in our area. We waited a couple extra weeks and continued to let our plants grow inside. Juuuuuust in case.
- Treat your soil as a living organism. You can’t grow anything with dead soil. It’s the bacteria and fungi under the surface that’s the magic to healthy plants. We built a hybrid version of the Hügelkultur, a permaculture method that’s been used in Europe for a very long time. The wood, leaves, and other compost under the garden soil will continue to breakdown and feed our plants for years
- Speaking of Hügelkultur… Compost everything. Well maybe not meat (to avoid predators), but everything from grass clippings to dead branches and food waste. Add springtails, worms, and isopods to your soil and compost to keep that ecosystem healthy. Since I’m a fisherman, I also regularly buried the fish skeletons of the fish I’ve harvested.
- If you have the space, use container plants as decoys for pests. Pests tend to target the weaker plants. I can’t explain it, but it seems as though the bugs only went after the plants in the containers and not the large plants growing in the beds.
- Weed early and often and eventually you won’t have to worry about weeds—your plants will overtake them.
- Learn how to water properly. You’d be surprised at how long it takes for water to reach down deep. Depending on the plant size, I watered initially for 10—30 seconds per plant and moved on. Once every plant had that initial water soak in, I doubled back and watered again. This gave the water time to break the soil surface tension and get down to the root structure.
- Don’t over water. Depending on your region, you don’t have to constantly be watering every day unless it’s extremely hot and dry. Soil that’s constantly wet can cause root rot or other mildew/mold disease. In order to maintain proper soil health, cover your soil with mulch or wood chips. This also helps retain moisture in the soil!
- Make sure you plant in an area that gets enough light. Every plant is different with its requirements. Gardens aren’t like tropical houseplants that can function in low light. They need ample amount of energy to produce fruit! Our tomato plants did so well because they got 8+ hours of light per day.
- Grow plants vertically to make the best use of space. By growing plants vertically via trellises or proper pruning you can yield a lot more food with a lot less space.
- Don’t get discouraged if stuff dies or don’t produce well the first year. There are a million pests, diseases, and other factors actively working against you and your plants. Think squirrels are cute? Surprise—they exist to murder your vegetables. Moths? Look out! Hornworms are going to eat your tomatoes! Those cute fluffy bunnies? Romaine murderers. Take the proper precautions to protect your garden. Build a wire fence, get neem oil, and get ready to fight.
- Termites. Termites feed on dead wood and other dead plant matter. In all my research, I couldn’t find a straight forward answer as to whether termites are harmful or beneficial to gardens. Since a termite colony has been breaking down the stump in the yard, I decided to take my chances with them. Throughout the summer, I found termites eating the natural pine mulch in the garden. It’s my guess that they were helping to break down the mulch and feed the soil. Not once did they cause any problems with the living plant matter. Our harvests were awesome.
- Don’t allow some plants to flower. If you’re growing plants like lettuce, cilantro, or basil, you’ll want to prevent them from growing tall and producing flowers. The plants’ chemistry changes in a lot of plants when they flower and they get bitter or stop producing the parts you can eat! On the flip side, you need some plants to flower like tomatoes and cucumber, in order to product fruit.

In the beginning: before the garden
I’ve always wanted a garden. It wasn’t until a couple of years ago when my wife and I bought our home that we actually had the space to build one. The spot we chose to place our little sanctuary was in the corner of the yard. A desolate little section with a single dead tree stump.
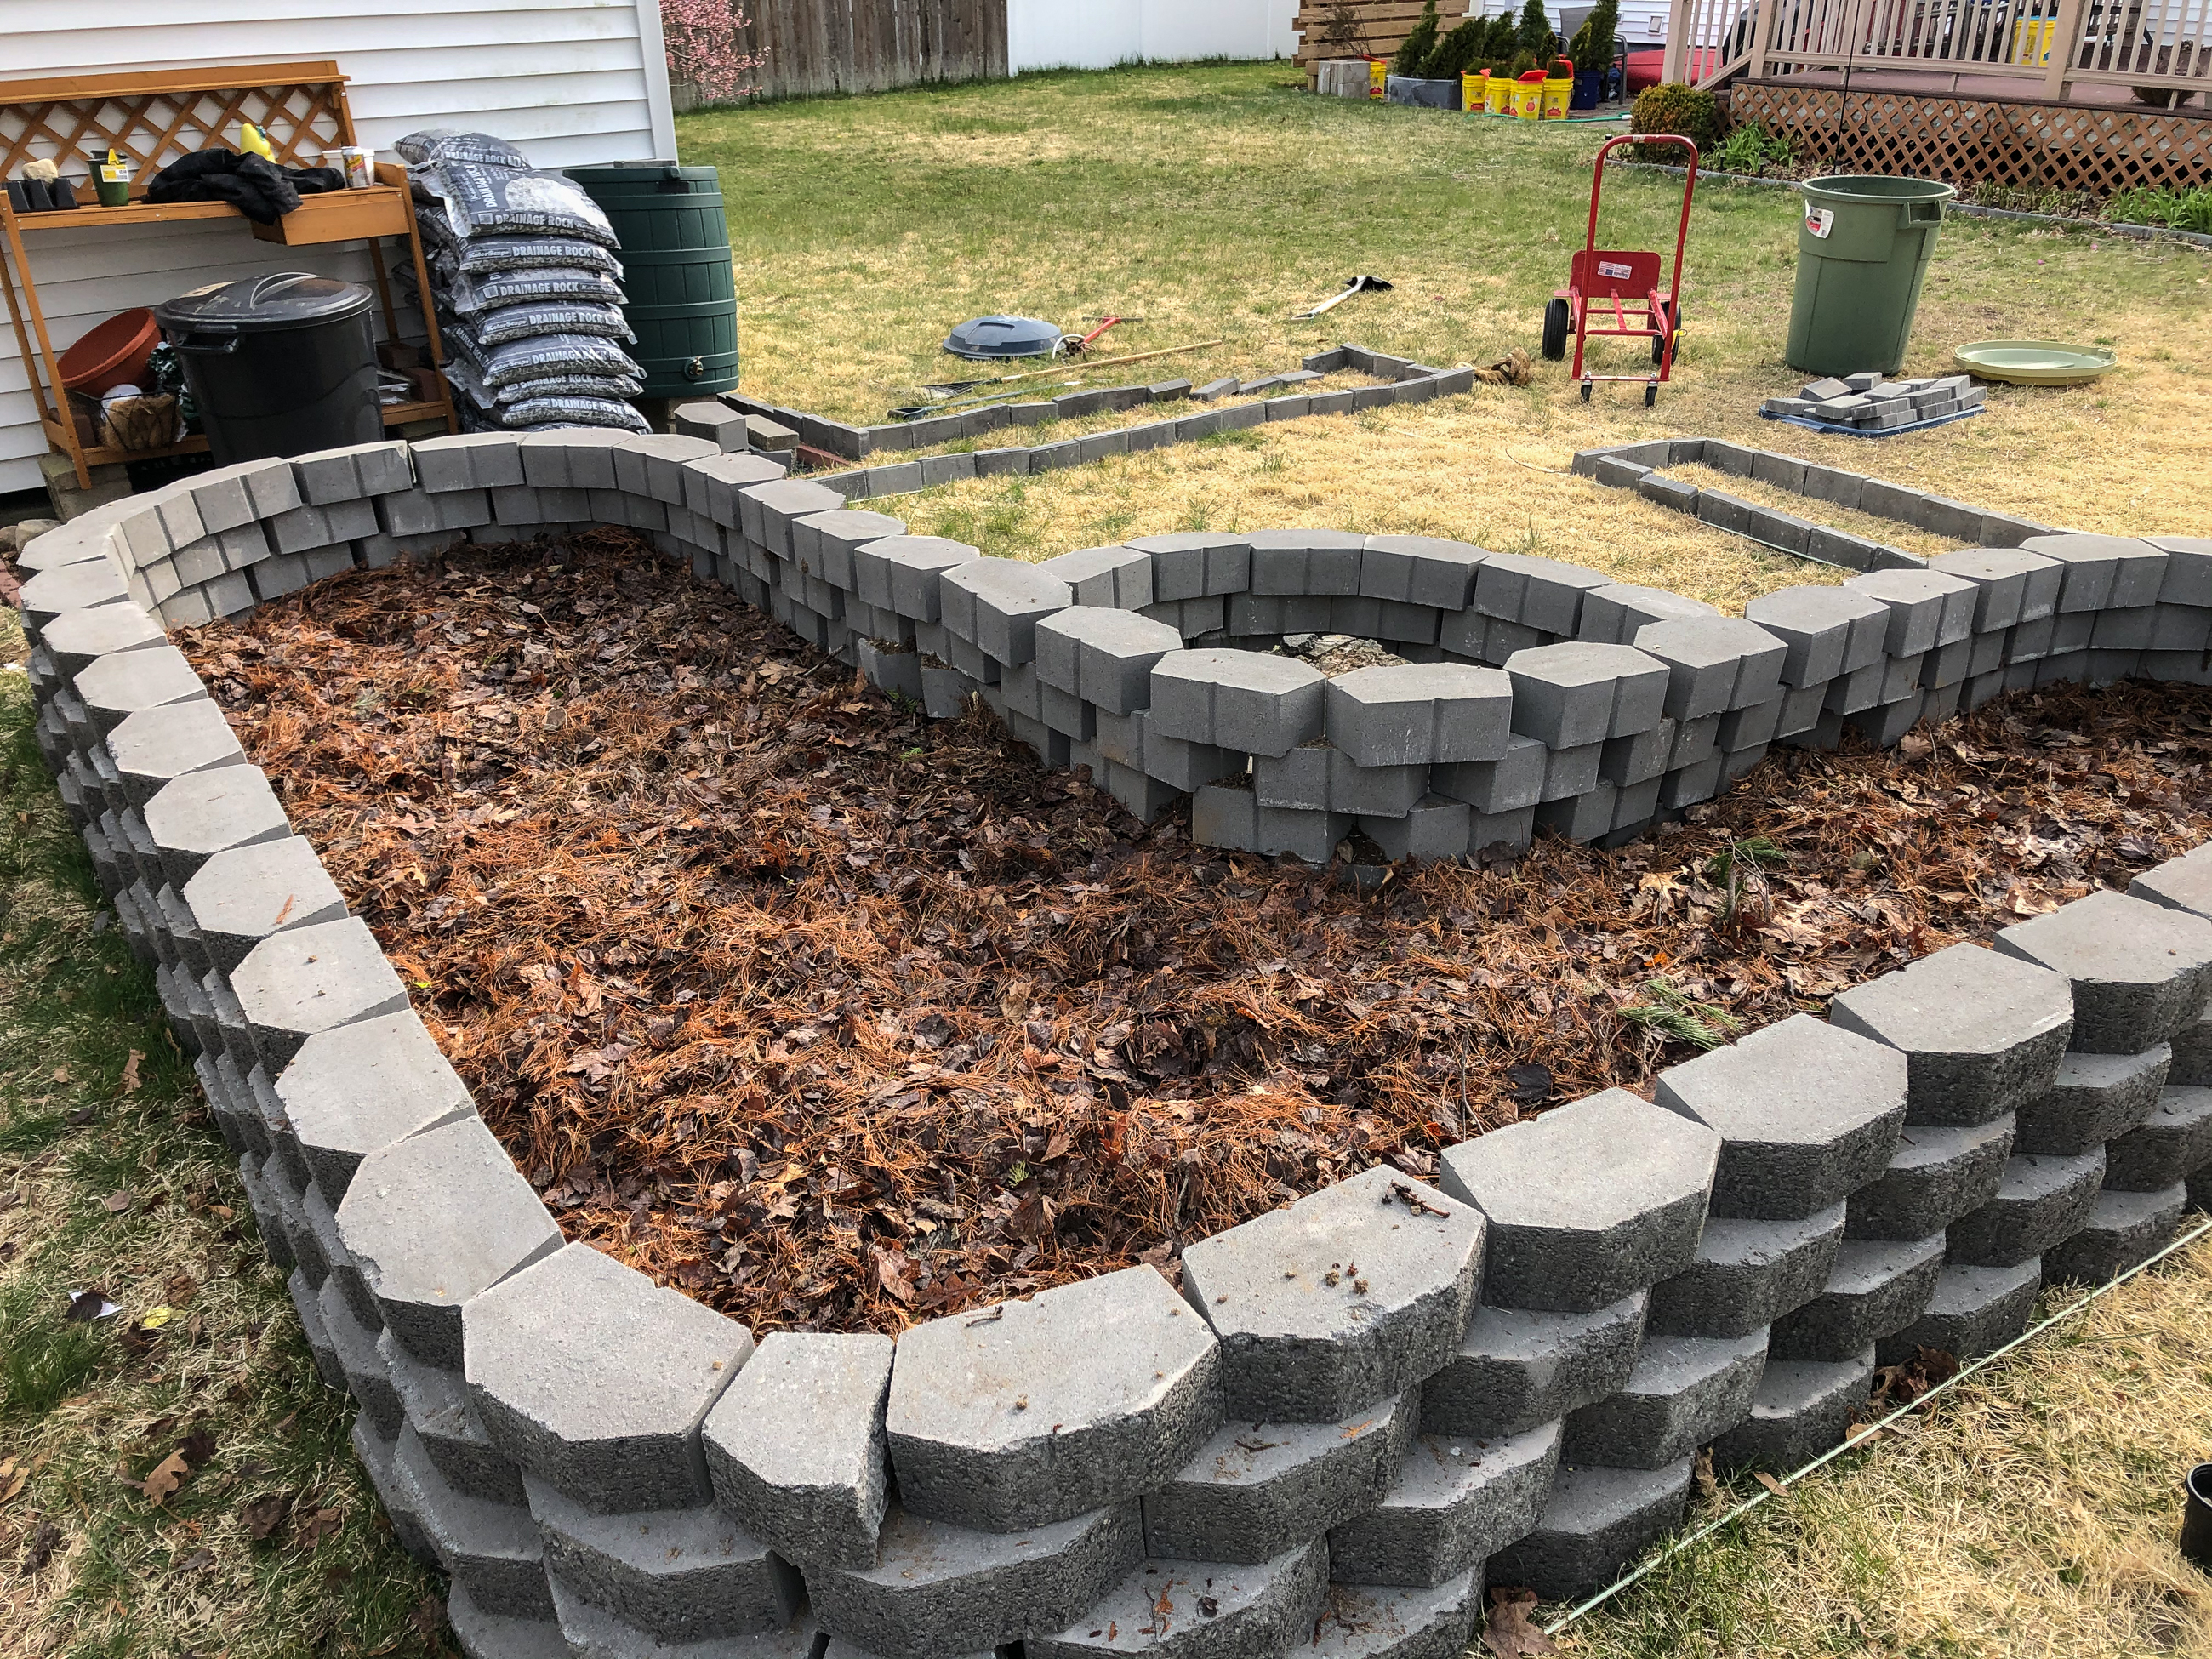
Early in 2020, we decided we were going to make it happen. In march, we began to germinate a ton of seeds under grow lights inside. At the beginning of April 2020, this was the corner of our yard.

The plan: design & food
I began to work up a plan to utilize every centimeter of space in the back corner in early March. We wanted to build a space that would survive the elements for many years. An area for an amazing garden, but also something that looked nice and was functional.
Initially, I wanted to go big and construct a wooden fence around the outside of the property. But I came to my senses and realized that our budget wasn’t thousands of dollars and I also wanted to focus on building the garden itself. Not the space around it. I whipped up some plans on some grid paper.


The design would be an L-shaped garden that allowed for 360 access around all sides. A compost pile would exist in the center around a dead stump with a termite colony in it. See the tl;dr of the post for my findings about termites in the garden. Surrounding the garden would be a square of drainage gravel. Half of the gravel area would have emerald green arborvitae that were given to us, and the other half would have our garden containers!
Over the years we’ve saved all the plastic cat litter buckets—that’s what all those yellow things are in the front of the garden, you’ll see below.. They’re each about 10 US gallons. In the bottom we drilled holes to allow for proper drainage.
The build
After I figured out all the precise measurements, I acquired the materials. A lot of people build garden beds with wooden raised beds. Those are fun, but they rot after about 10 years in New England. Aside from that, they’re low to the ground. We decided to build our garden using retainer wall blocks.
The layers
Retainer wall blocks allowed us to build a garden area that was not only aesthetically pleasing, but tall. I’m a tall guy and not having to bend over much to pluck our veggies is a plus. Also, we were able to toss in an ample amount of dead leaves, pine needles, and sticks as a compost base layer.
On top of that, a couple of feet of fresh loam was applied. We had fresh loam delivered from a local garden center. Loam is perfect for gardening—It is a perfect mixture of clay, silt and sand. This mixture is important because it holds moisture while allowing for proper drainage around the plant root systems.
After we planted the garden, I applied a few inches of organic pine mulch / wood chips. Mulch serves multiple purposes. It will slowly break down over the years and feed your garden. It also protects the top layer of soil and maintains moisture. As I mentioned in the tl;dr, the bacteria and fungi are the key players in the soil. Without covered soil, the sun destroys them.


Around the garden
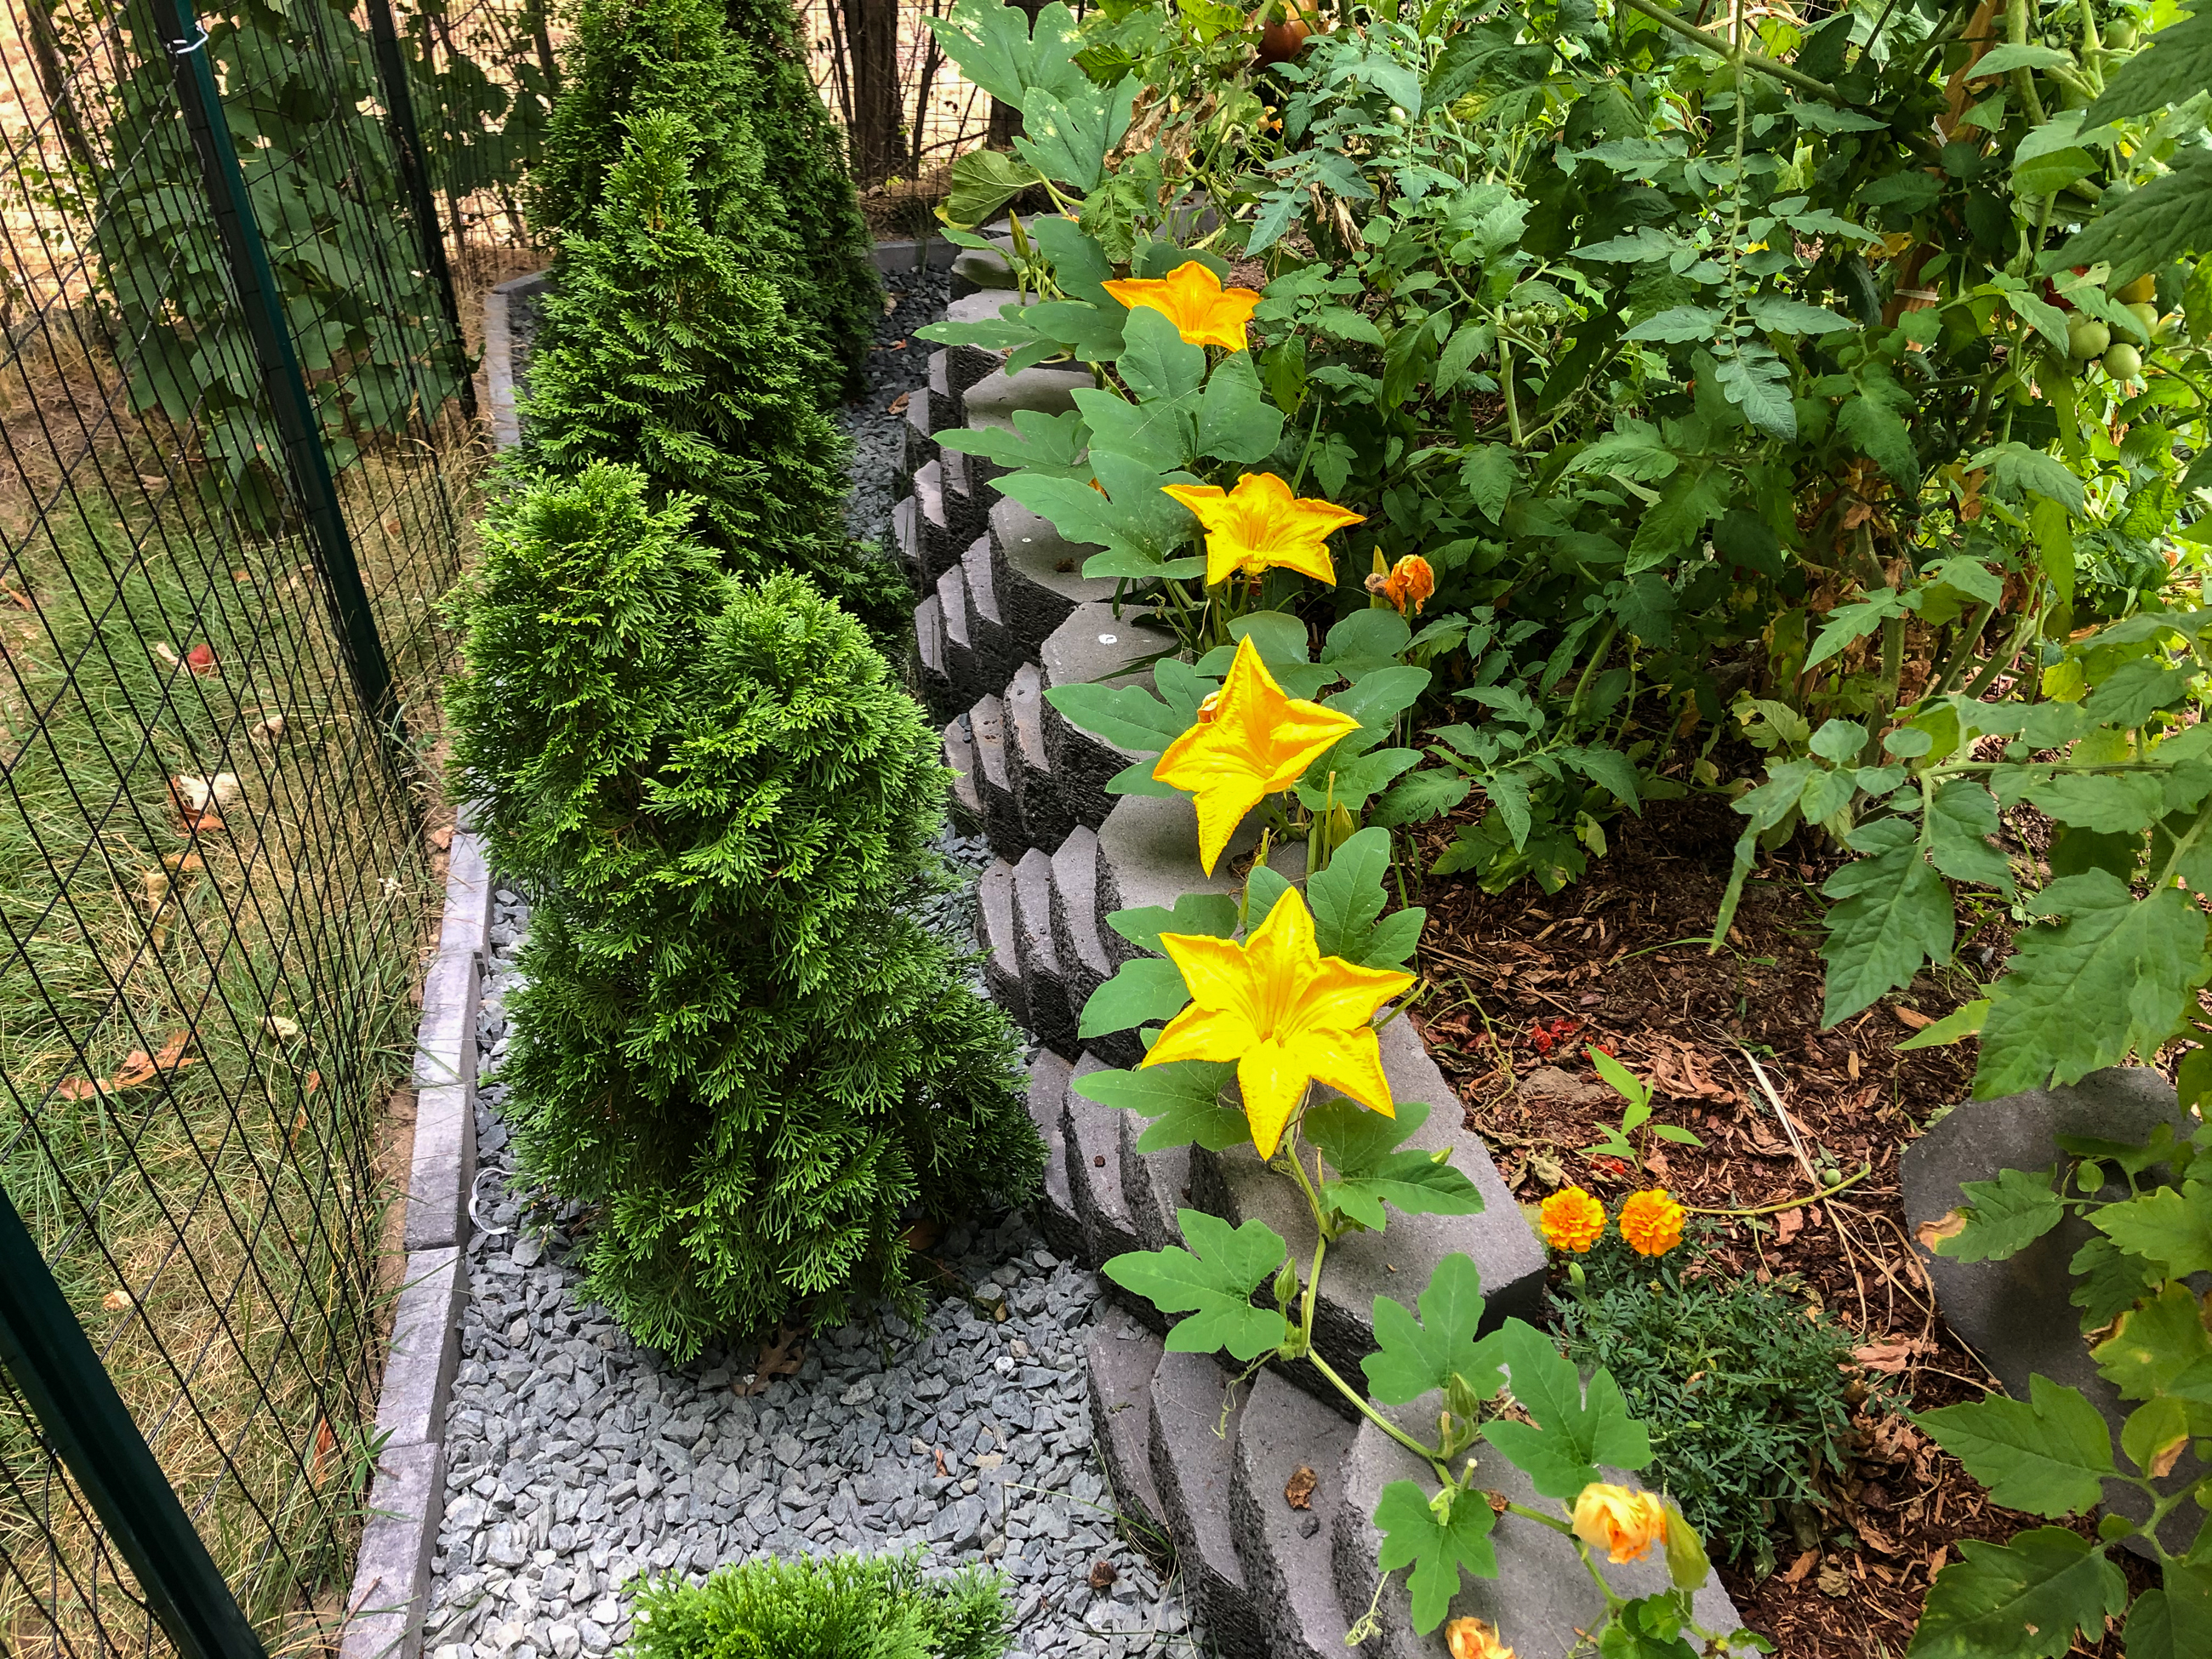
In the photos above, you can get a glimpse at the layers within the garden itself. On the outside of the garden, we cleared all the grass, planted the green emerald arborvitae (that my wife’s friend gave us for free!), and laid down a ton of drainage gravel. there’s 360 degree access to the garden
On the outer perimeter, I assembled a wire fence. Wire fences are very affordable and proved to be successful in keeping out pests—not one furry critter ate our bounty. The arborvitae will eventually grow into a nice privacy wall since the yards in our neighborhood blend together.


Time to finish the build
It took about 6 weeks, but the structure came out really well. Is it perfect? Absolutely not. On the left side of the fence I discovered an underground stone wall (classic New England!) that screwed up the measurements a bit and made it extremely difficult to put the metal poles in the ground. The outer paver blocks on the edges of the gravel are a little off as well, but they get the job done.
Structures to support the plants
- The tall wooden poles are called furring rods and are extremely cheap. Super effective for growing tomatoes vertically. Just a couple bucks each.
- The metal trellis like structure in the back that’s looped over is called a cattle panel. This turned out to be perfect for cucumbers and squash to vine up. It’s also probably going to outlive me and only cost about $25 USD.
- Also in the back left I constructed some cone-shaped structures out of plant stakes. Around them, I wrapped twine. The squash and pumpkin vines loved this. About $4 for a pack of 12.
The harvest
Within a couple of weeks things were already beginning to fruit. It seemed our cherry tomatoes were growing several inches per day, it was insane.

The plants
For our first year I wanted to see what we could grow, regardless of how much we wanted to eat it. Sounds silly I know, but as I mentioned above, different plants require different things: soil alkalinity, light, moisture, nutrient composition, temperature, etc. I wanted to see what our soil and garden microclimate was best suited for.
The success rate of what we planted:
- Cherry tomatoes: most successful
- Kale: most successful
- Slicer tomatoes (big daddy variety): somewhat successful. plant destroyed by wind in late July
- Beets: small, but very successful
- Bush cucumbers: very successful
- Romaine lettuce: very successful, but went to flower quickly
- Mesclun lettuce: very successful
- Pumpkins: still growing, but damage due to mildew
- Winter squash (several types): somewhat successful, but damaged due to mildew and heat
- Cantaloupe: not successful
- Bell peppers: still growing. started late.
- Broccoli: unsuccessful due to aphids (assholes)
- Eggplant: somewhat successful. stunted growth in containers
- Potatoes (seed potatoes): successful. limited size in containers
- Onions: still growing
- Watermelon: unsuccessful due to temperature and container contraints


Herb garden
We also had a container herb garden that we planted in containers. Mainly because mint spreads like fire. The basil and cilantro required a lot of pruning maintenance to prevent them from going to flower, which somewhat ruins harvest-ability.

- Spearmint: successful
- Chocolate mint: successful
- Pineapple mint: successful
- Ginger mint: successful
- Thyme: successful
- Thai Basil: successful. Accidentally let it go to flower in August
- Cilantro: successful for a short time. It’s an aggressive flowering plant. Had to prune daily.
With our extensive planning we were lucky enough to reap some rewards from May to September (still going!). Most notably our 8—10 foot cherry tomato plants and cucumbers!

Difficult to see, but after our cherry tomato plants reached 8+ feet, I couldn’t reach them anymore. The plants kept growing though! They started to dip to the side at the top there. I actually tried to tie another plant stake to the 8 foot furring rod for more guidance. the overall length of a few of these cherry tomatoes reached over 10 feet long with hundreds of tomatoes. It’s insane.
What are the plans for next year?
Next year we’re going to focus on growing the plants we love to eat like tomatoes and cucumber. I’d like to try some new fruit and veggies as well. I’d love to hear your suggestions.

Questions or comments?
Did we do everything right? Absolutely not. Did we have a blast learning and eating food that we cultivated? Hell yeah. Let us know if you have any questions. I barely scratched the surface of the details within this post.
Happy growing, y’all.
Leave a Reply